
Controller: clock, date and NTP
Controller: clock, date and NTP
480 × 320 display screens in the selected language. The yellow outline marks where to tap. Illustrated data is for demonstration.
Have the current local time, date and your own PIN ready. Turn NTP off before manual editing. 12:30 and 2026-11-06 are examples only; time and date are saved separately. Controller access codes →
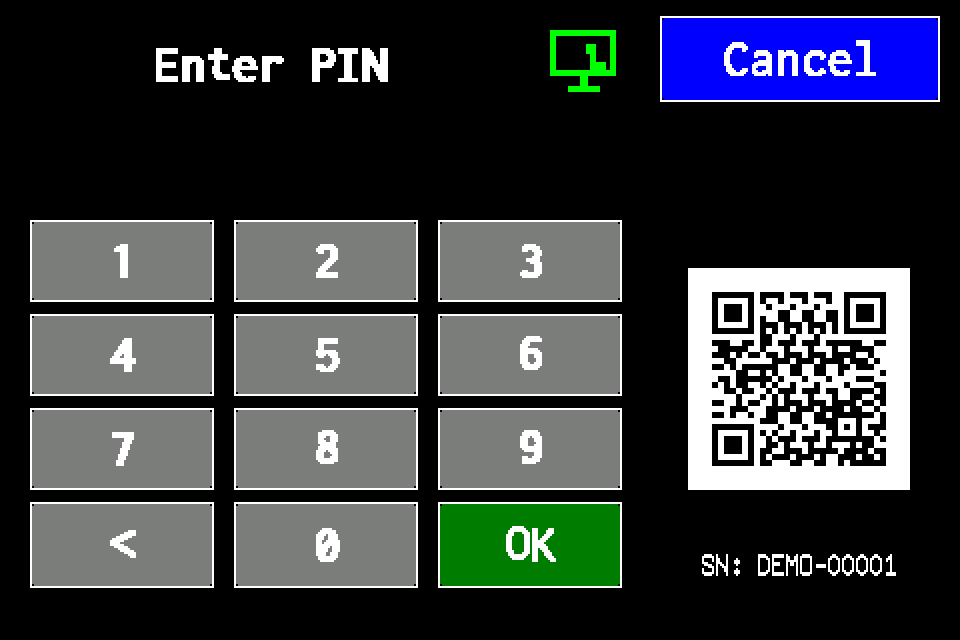
If the controller asks for a PIN
Enter your PIN on the display and confirm with OK. Use an account authorised for controller settings. If already signed in, continue to the next menu screen. Controller access codes →
In METRO, the PIN window retains its original appearance. Controller access codes →
-
EZF480 × 320 · Classic
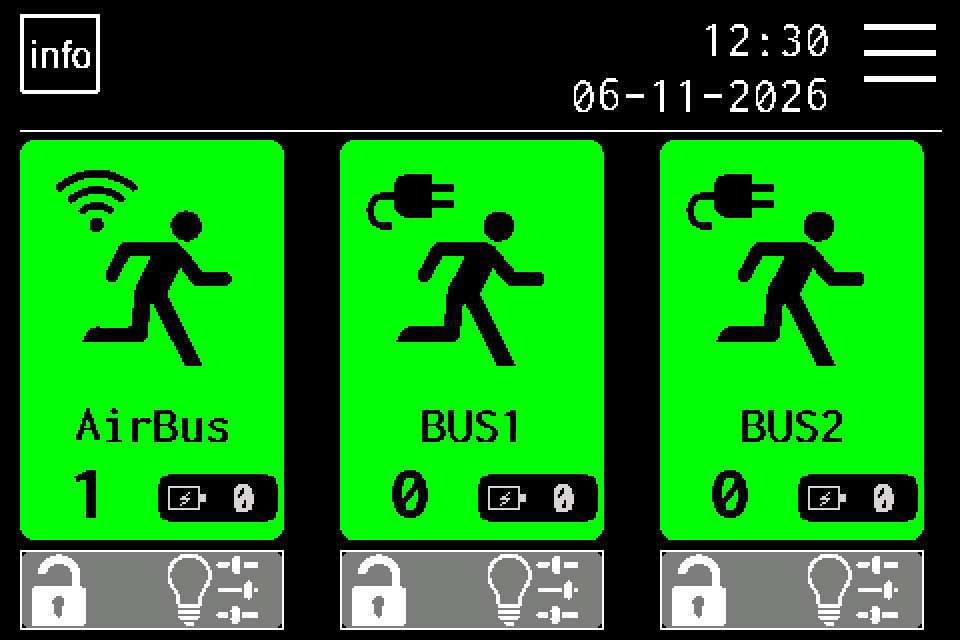 1Step 1 / 15
Open MENU
On the home screen, tap MENU in the upper right. If prompted, enter your own PIN and confirm with OK. Controller access codes →
-
EZF480 × 320 · Classic
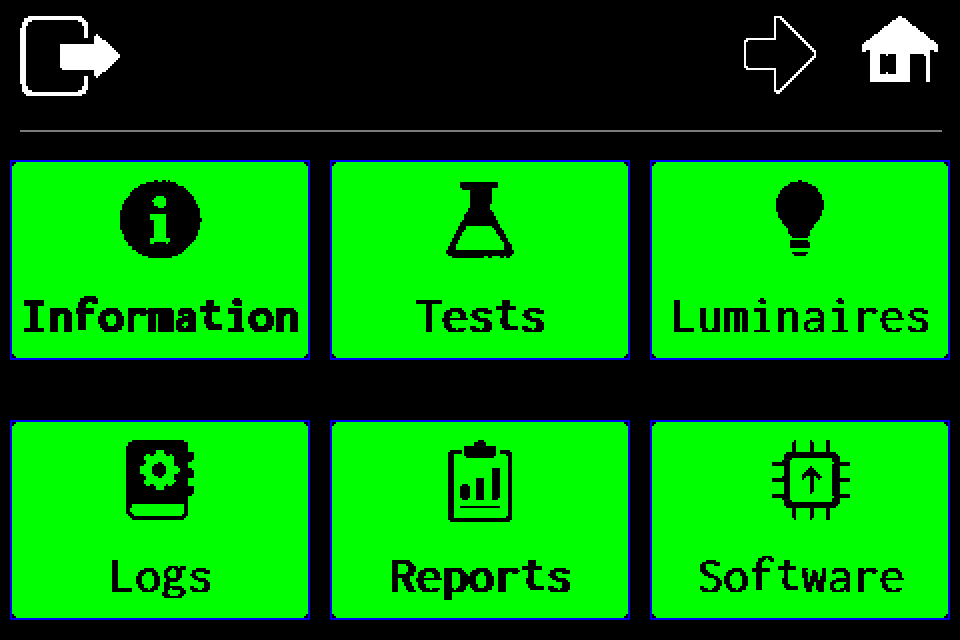 2Step 2 / 15
Open the second menu page
Tap the right arrow in the top bar.
-
EZF480 × 320 · Classic
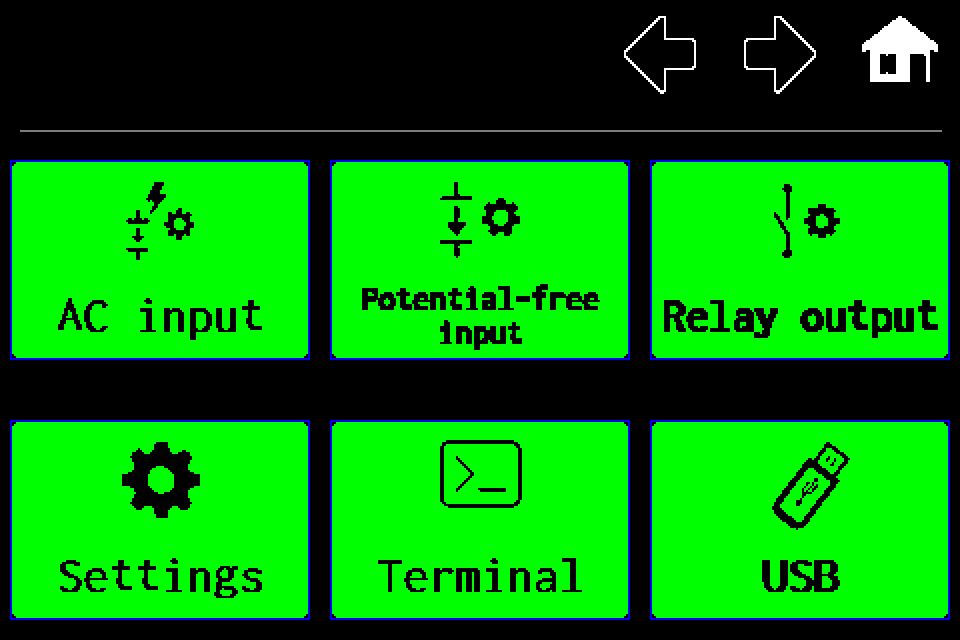 3Step 3 / 15
Choose “Settings”
On the second menu page, tap Settings in the lower left.
-
EZF480 × 320 · Classic
 4Step 4 / 15
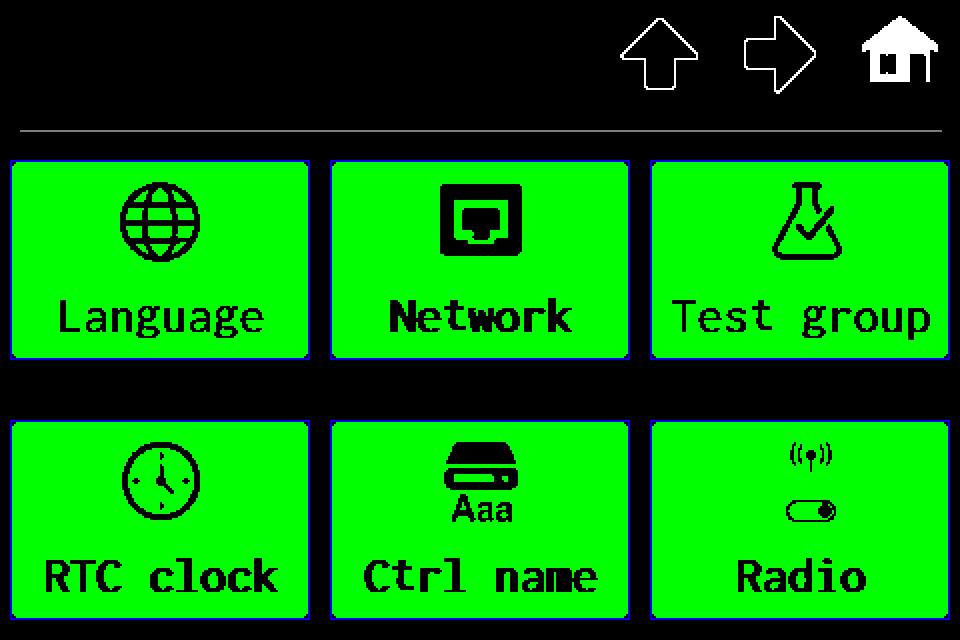
Open “RTC clock”
Tap RTC clock in the lower left. Time, Date and NTP each have their own settings screen.
-
EZF480 × 320 · Classic
 5Step 5 / 15
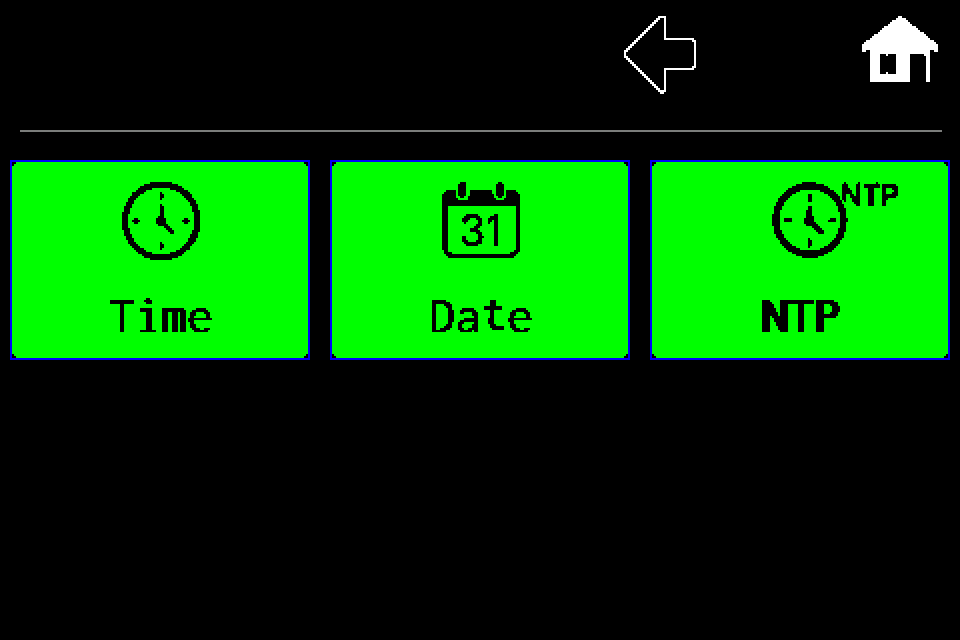
Open NTP
Tap the NTP tile in the upper right.
-
EZF480 × 320 · Classic
 6Step 6 / 15
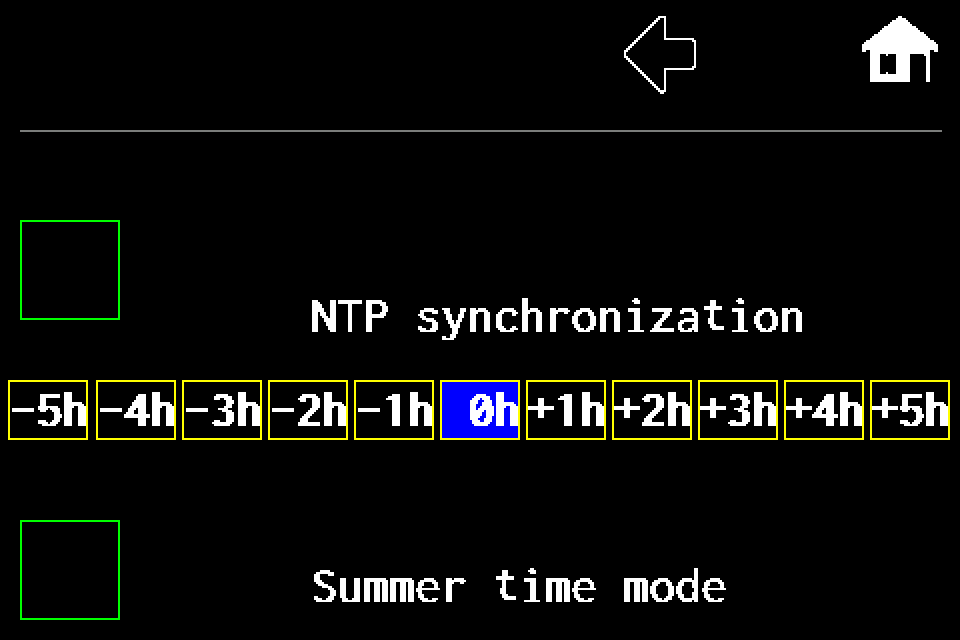
Turn synchronization off for manual setting
Check the square beside NTP synchronization. A solid green square means enabled: tap it so only the green outline remains, as shown. Leave an already empty square unchanged.
-
EZF480 × 320 · Classic7Step 7 / 15
Keep the NTP setting
Tap the left arrow. Leaving the NTP screen saves its settings and returns to Time / Date / NTP.
-
EZF480 × 320 · Classic8Step 8 / 15
Choose “Time”
Tap Time in the upper left.
-
EZF480 × 320 · Classic
 9Step 9 / 15
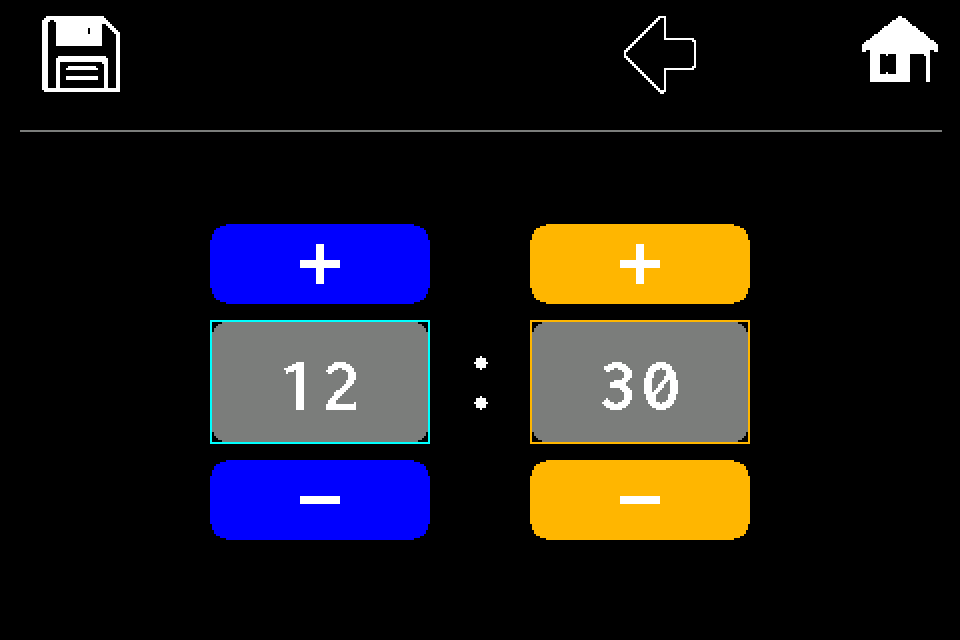
Set hours and minutes
The left column is hours and the right is minutes. Use + above and − below each value. Hours range from 00–23 and minutes from 00–59, wrapping at the limits. The example shows 12:30.
-
EZF480 × 320 · Classic10Step 10 / 15
Save the time with the disk icon
Tap the save icon in the upper left. The time is saved and the clock menu opens. The left arrow and home icon leave this screen without saving the edits.
-
EZF480 × 320 · Classic11Step 11 / 15
Choose “Date”
After saving the time, tap the middle Date tile.
-
EZF480 × 320 · Classic
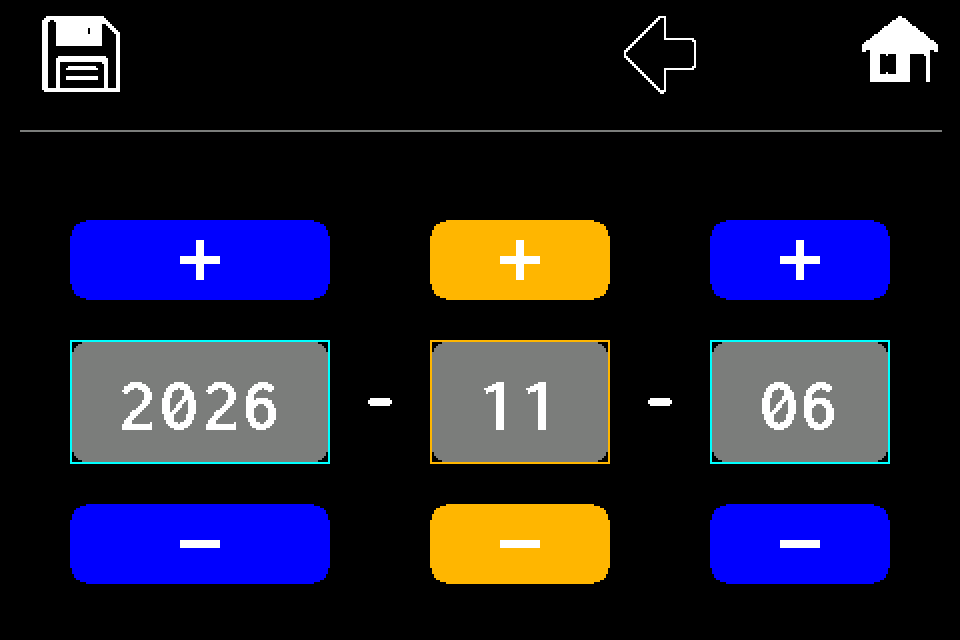 12Step 12 / 15
Set year, month and day
The columns are year, month and day from left to right: YYYY-MM-DD. Use + and − in each column. Years range from 2025–2099; month lengths and leap years are taken into account. The example 2026-11-06 means 6 November 2026.
-
EZF480 × 320 · Classic13Step 13 / 15
Save the date
Tap the disk icon in the upper left. Date and time are saved separately. The back arrow or home icon does not save the edited date.
-
EZF480 × 320 · Classic14Step 14 / 15
Return to the home screen
After saving, tap the home icon in the upper right.
-
EZF480 × 320 · Classic15Step 15 / 15
Check the clock on the home screen
Return using the home icon and check the date and time in the top bar. NTP synchronization stays off until you enable it again.
Check both date and time on the home screen. Each settings page has its own disk-icon save. Keep NTP off for manual operation so synchronization does not replace your settings.