
EZF Wiki/Network and email
Article · EN

CLOUD email notifications — setup and test

Recipient, alarm conditions, reminders and reports after tests, with display screens and PIN login. Controller access codes →

NETWORK AND EMAIL · STEP BY STEP

CLOUD email notifications: setup and test

480 × 320 display screens in the selected language. The yellow outline marks where to tap. Illustrated data is for demonstration.

Display interface
Before you start

Configure the network first and verify the controller portal/cloud connection. SMTP delivery must be configured in the portal. Use your own Administrator or Service PIN and recipient address; alarm@example.com is only an example. Controller access codes →

  1. EZF480 × 320 · Classic
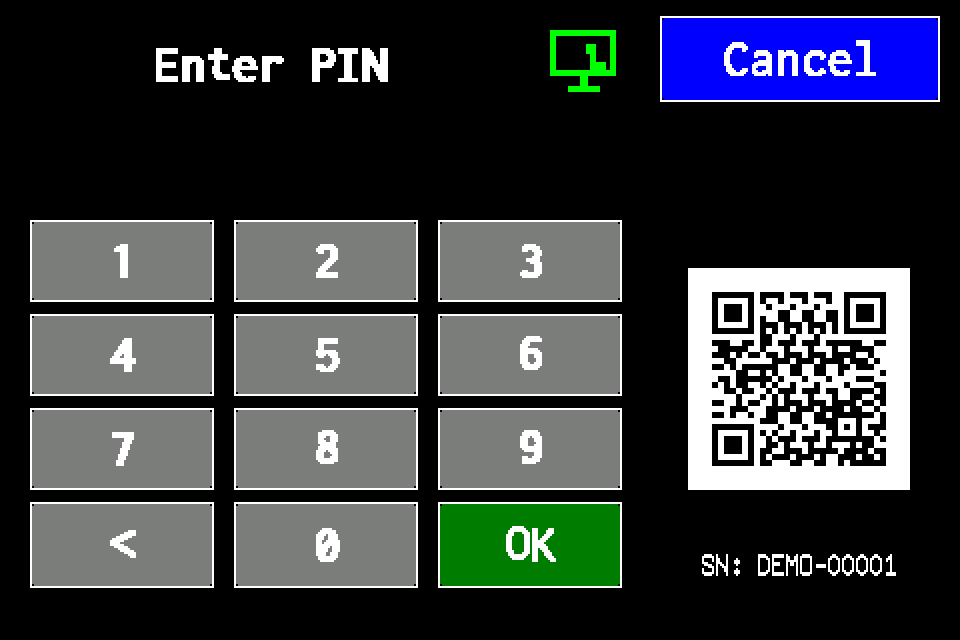
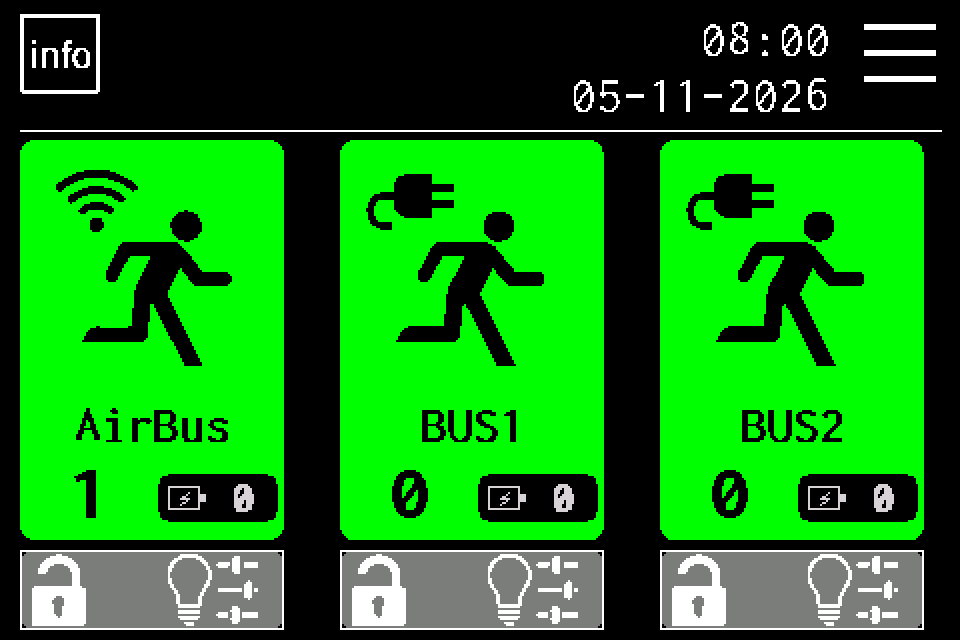
    Step 1: Open MENU and sign in with your PIN
    1Step 1 / 16

    Open MENU and sign in with your PIN

    Tap the menu icon in the upper right. If prompted for a PIN, use your own Administrator or Service account. Only these roles can access E-mail CLOUD. Controller access codes →

  2. EZF480 × 320 · Classic
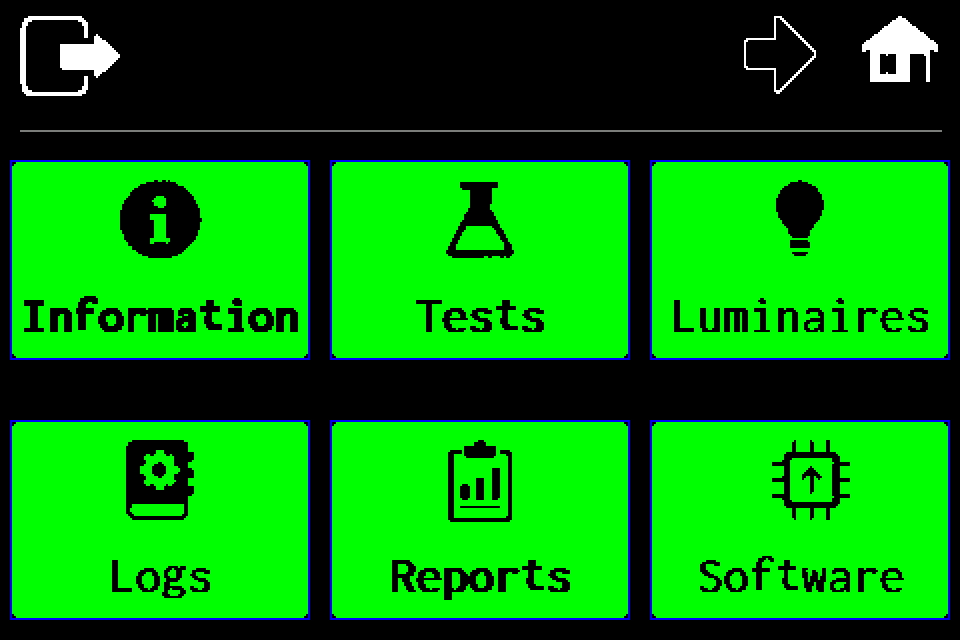
    Step 2: Open the second menu page
    2Step 2 / 16

    Open the second menu page

    On the first menu page, press the right arrow in the top bar.

  3. EZF480 × 320 · Classic
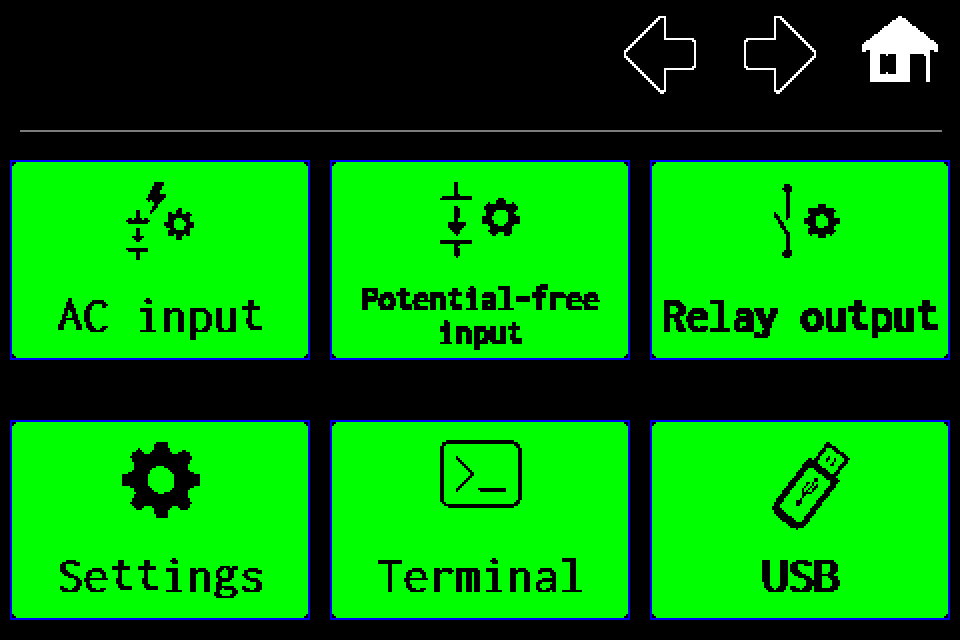
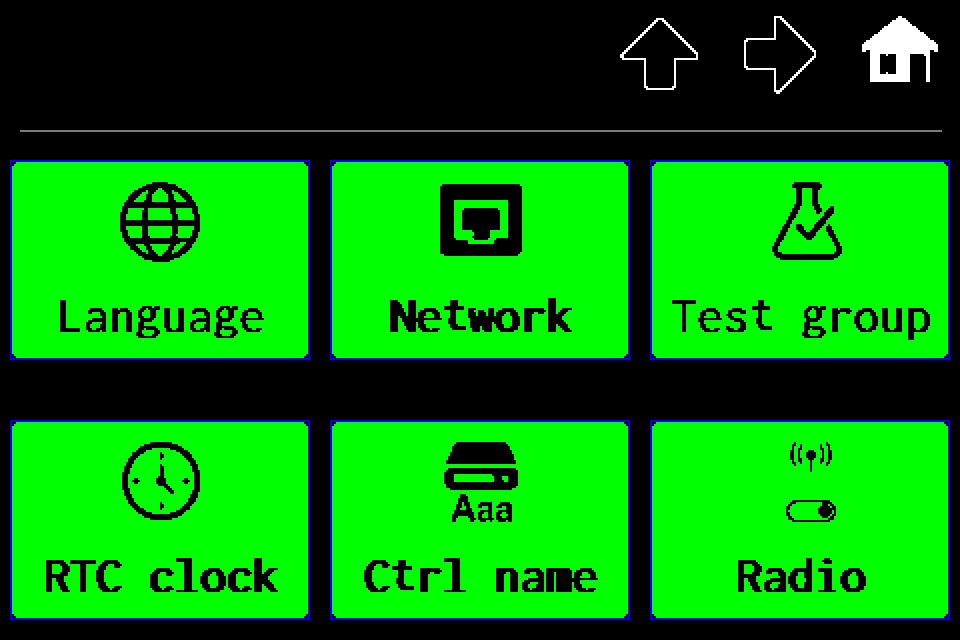
    Step 3: Open “Settings”
    3Step 3 / 16

    Open “Settings”

    Tap the Settings tile in the lower left.

  4. EZF480 × 320 · Classic
    Step 4: Go to the next settings page
    4Step 4 / 16

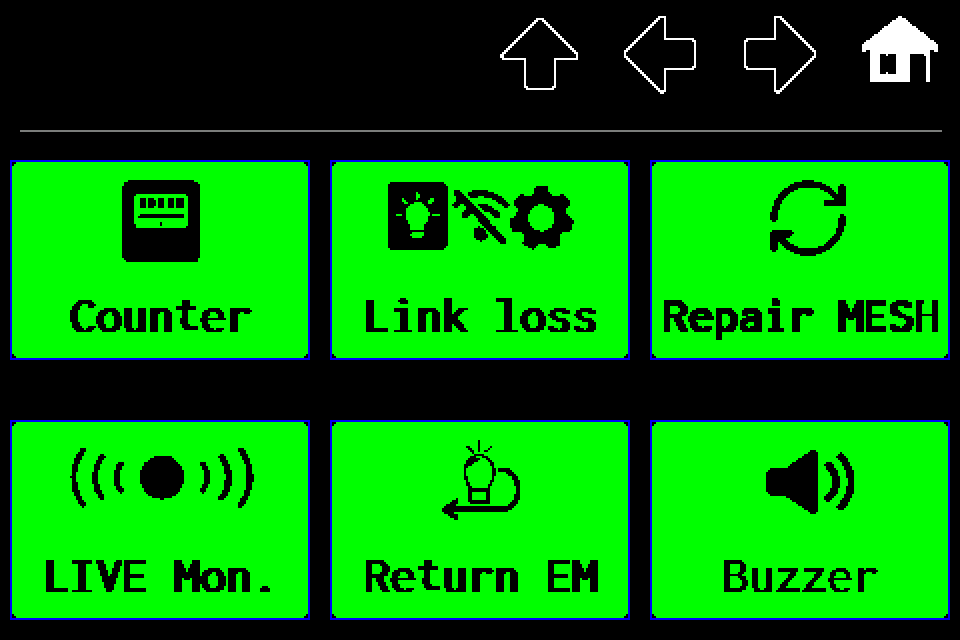
    Go to the next settings page

    Press the right arrow in the top bar. Do not select Network here; the network connection should already be configured.

  5. EZF480 × 320 · Classic
    Step 5: Open the next settings page
    5Step 5 / 16

    Open the next settings page

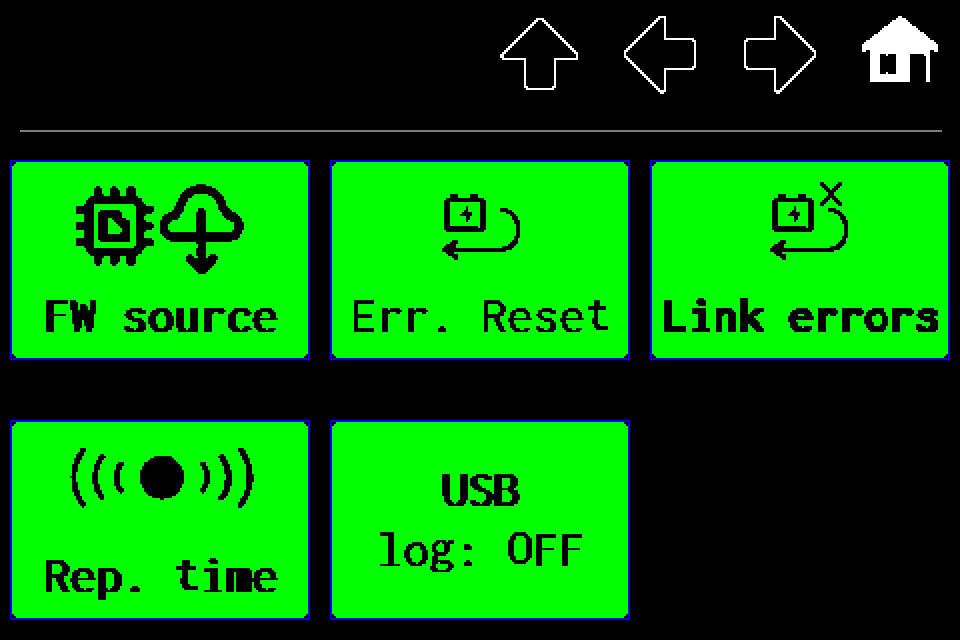
    Press the right arrow again. A Service account goes directly to the E-mail CLOUD page. An Administrator first sees the page shown in the next step.

  6. EZF480 × 320 · Classic
    Step 6: Administrator: press right once more
    6Step 6 / 16

    Administrator: press right once more

    As Administrator, press the right arrow once more. If E-mail CLOUD is already visible, continue to the next step. Do not activate the other functions on this page.

  7. EZF480 × 320 · Classic
    Step 7: Open “E-mail CLOUD”
    7Step 7 / 16

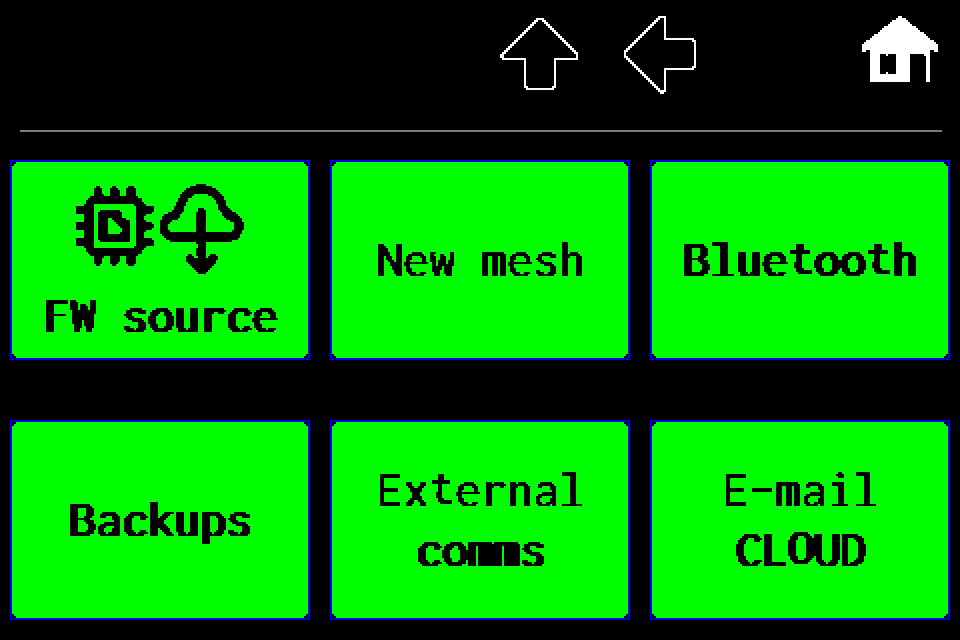
    Open “E-mail CLOUD”

    Tap E-mail CLOUD in the lower right. If it is missing, check that the PIN session is active and that you are using an Administrator or Service account. Controller access codes →

  8. EZF480 × 320 · Classic
    Step 8: Enter the recipient address
    8Step 8 / 16

    Enter the recipient address

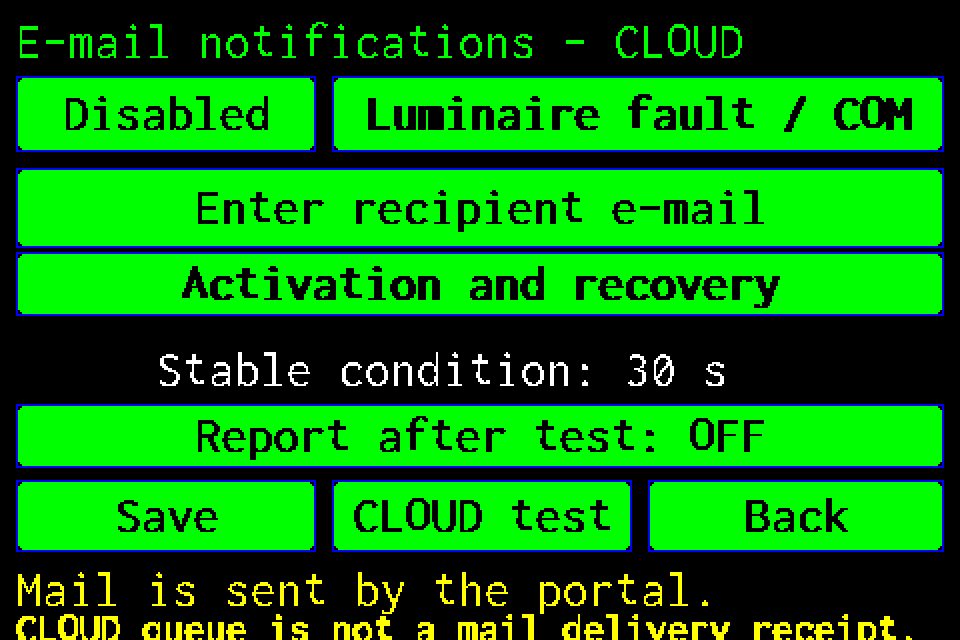
    Tap the wide address field and enter one recipient mailbox address. This is not a form for the sender SMTP account.

  9. EZF480 × 320 · Classic
    Step 9: Type the email and confirm with OK
    9Step 9 / 16

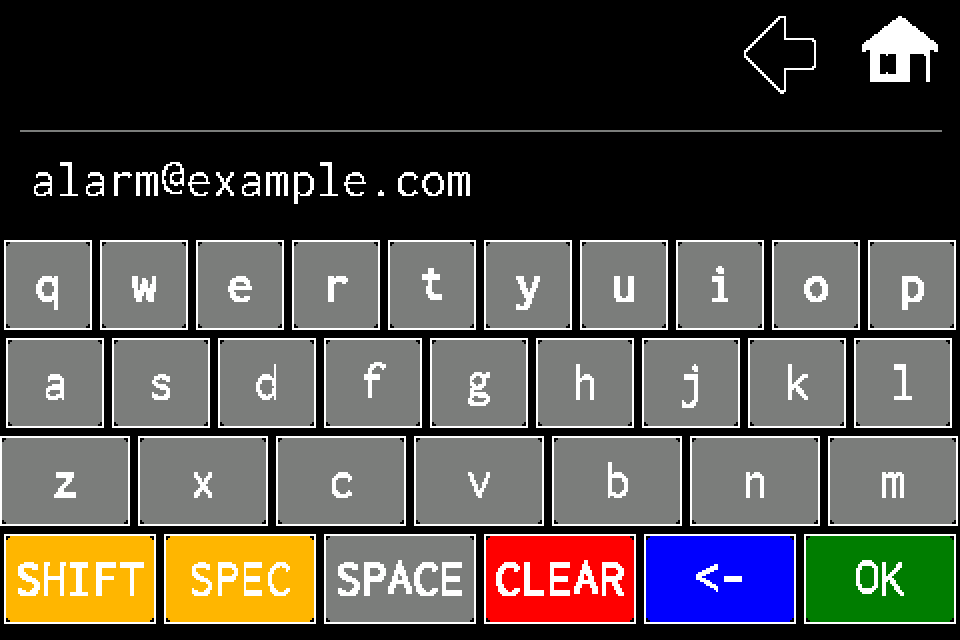
    Type the email and confirm with OK

    Enter your own recipient address; the example shows alarm@example.com. The symbol key at the bottom provides characters such as @. Finish with OK in the lower right and check the spelling after returning.

  10. EZF480 × 320 · Classic
    Step 10: Set event notifications to Enabled
    10Step 10 / 16

    Set event notifications to Enabled

    The upper-left button should show Enabled, as illustrated. If it shows Disabled, tap it once. This switch controls events; reports after tests have a separate setting.

  11. EZF480 × 320 · Classic
    Step 11: Choose the notification condition
    11Step 11 / 16

    Choose the notification condition

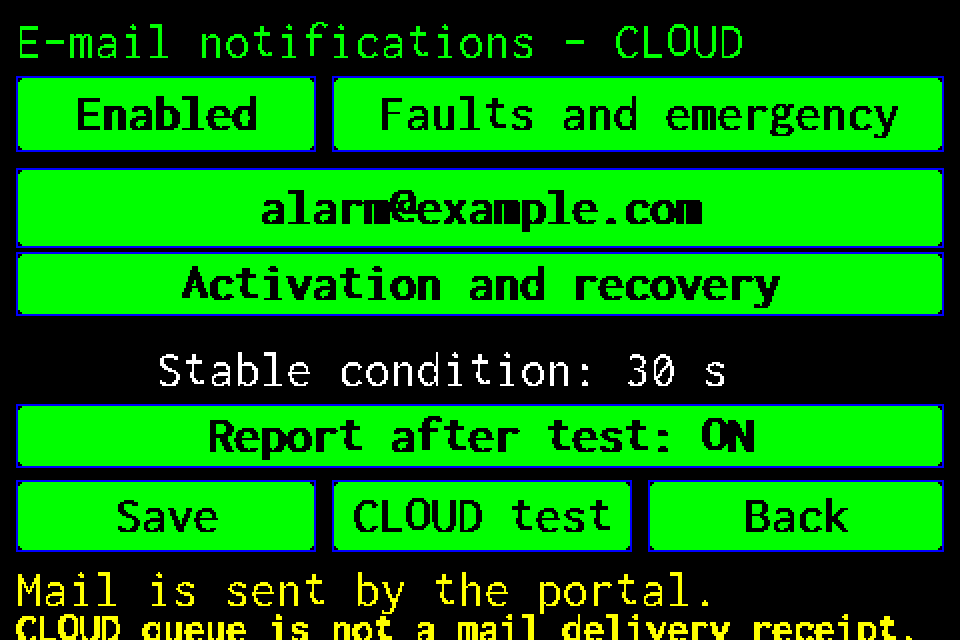
    The upper-right button cycles through conditions. The example uses Faults and emergency. Other choices are luminaire/communication faults, a running test, emergency mode alone or All healthy.

  12. EZF480 × 320 · Classic
    Step 12: Choose when to notify
    12Step 12 / 16

    Choose when to notify

    Tap the wide button below the address until the desired method appears. The example Activation and recovery reports both the start and end of the condition. On activation reports only its start; Also reminders adds repeat notifications.

  13. EZF480 × 320 · Classic
    Step 13: Optionally enable reports after tests
    13Step 13 / 16

    Optionally enable reports after tests

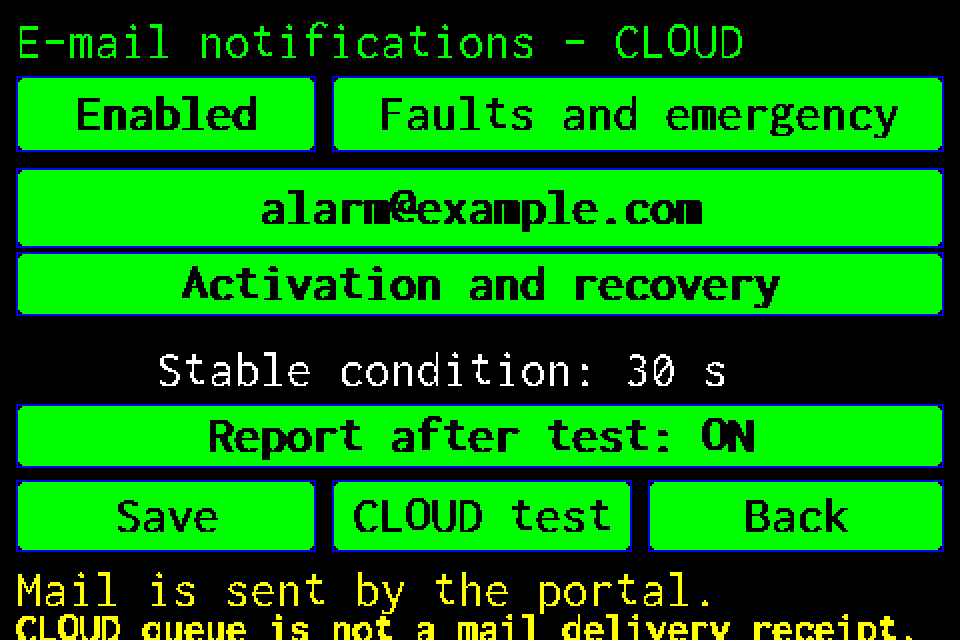
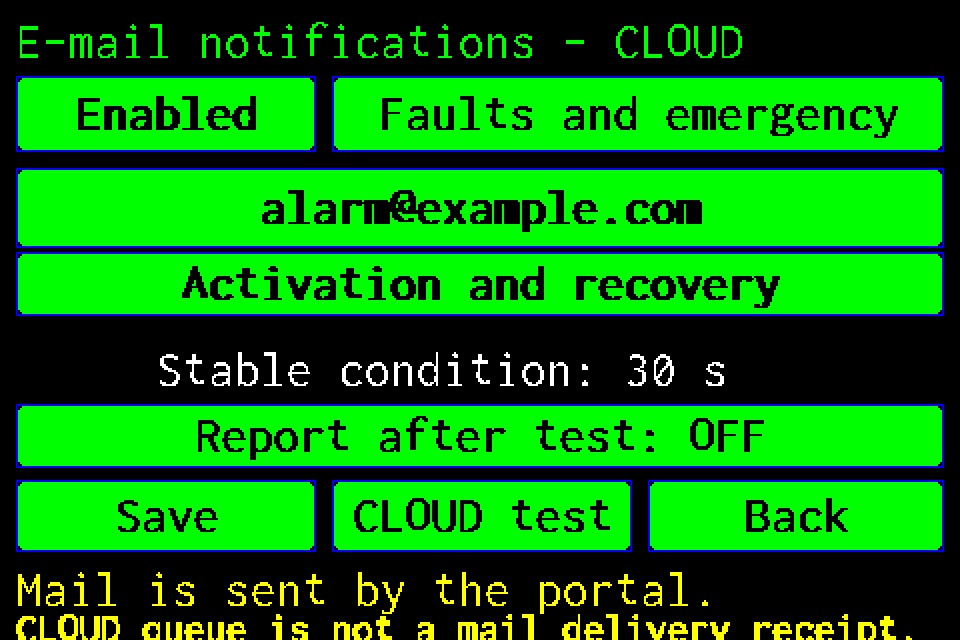
    Tap Report after test to choose ON or OFF. This setting is independent of the event switch. Enabling it sends new reports; existing archived reports are not sent again.

  14. EZF480 × 320 · Classic
    Step 14: Save the configuration
    14Step 14 / 16

    Save the configuration

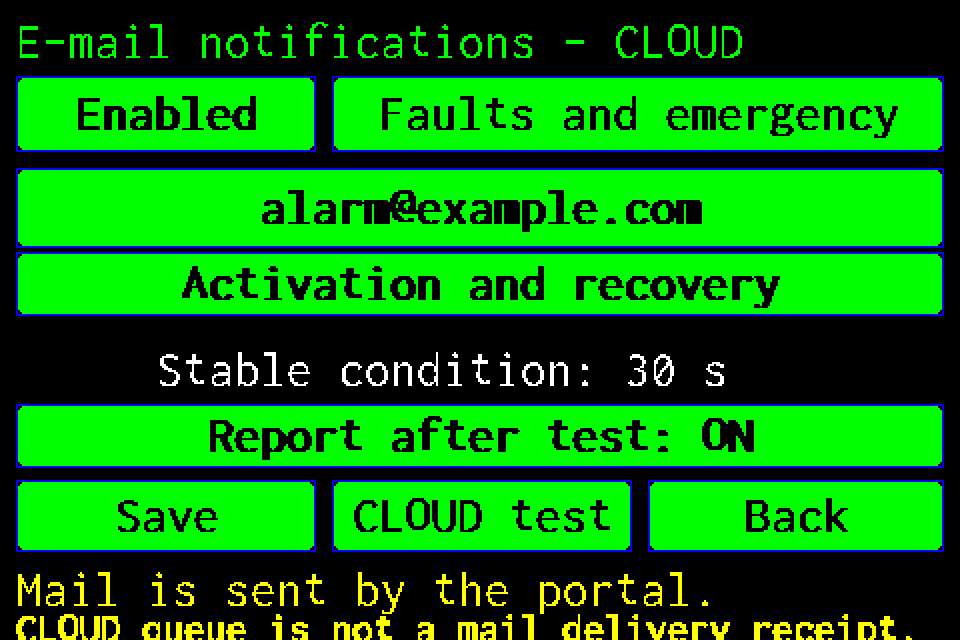
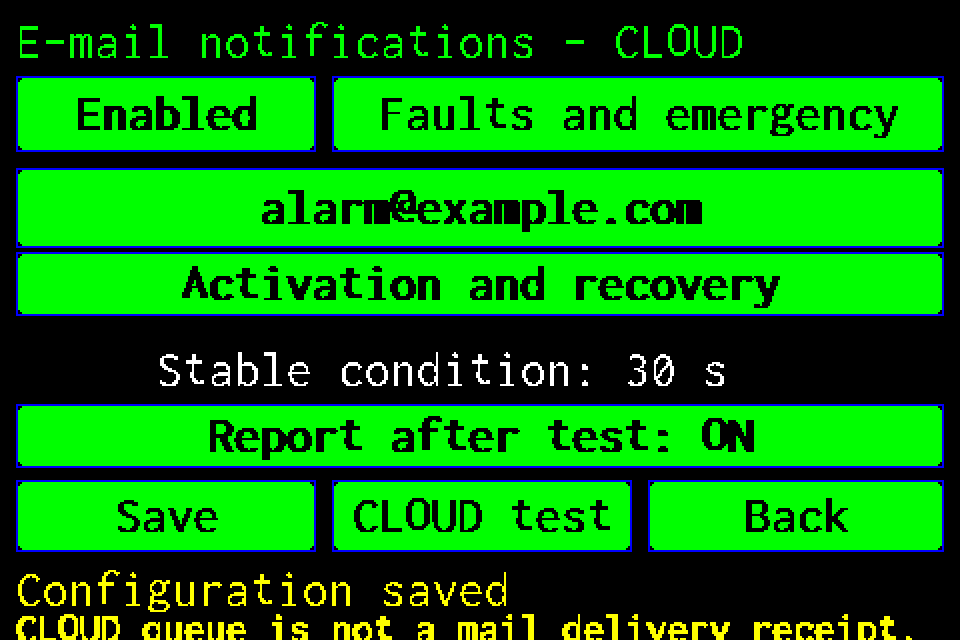
    Check the recipient and selected options, then press Save. Back does not save changes. Stable condition displays the condition confirmation delay and is not editable on this screen.

  15. EZF480 × 320 · Classic
    Step 15: Run CLOUD test after saving
    15Step 15 / 16

    Run CLOUD test after saving

    After Configuration saved, press CLOUD test. If Save configuration first appears, save the current settings and repeat the test.

  16. EZF480 × 320 · Classic
    Step 16: Check the recipient inbox
    16Step 16 / 16

    Check the recipient inbox

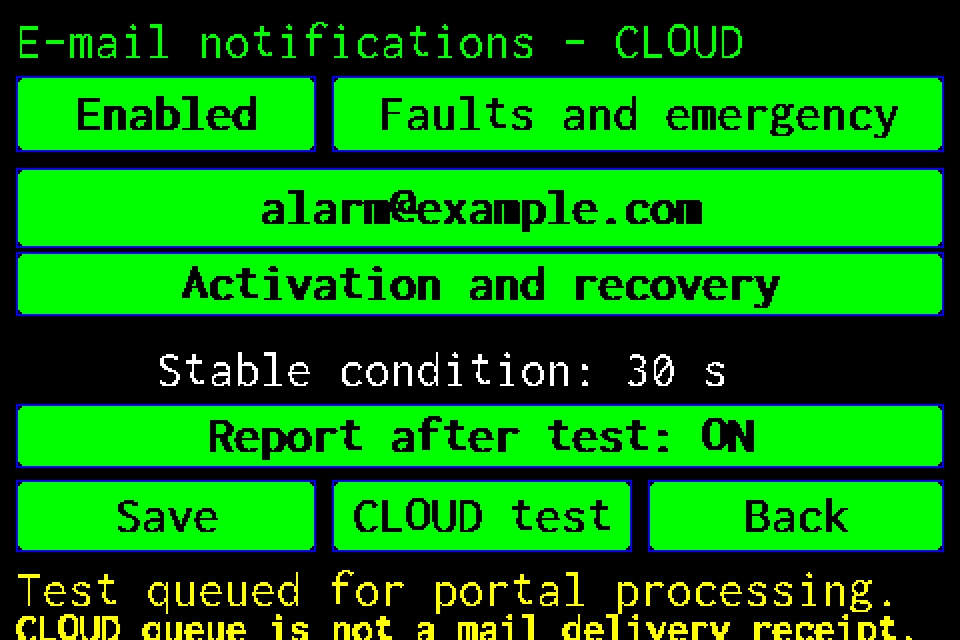
    Test queued for portal processing confirms the test request, not email delivery. Check the recipient inbox and spam folder. If no message arrives, check the address, portal connection and the portal mail-sending configuration.

Finish and verify

Setup is complete after saving the settings and checking an actual message in the recipient inbox. A CLOUD queue acknowledgment is not a delivery test. Back leaves the screen without saving further edits.

Other network and email guidesWi‑Fi client: select and scan networks →Switch from Wi‑Fi client to LAN →Switch the interface to Access Point →DHCP or static IP address →

Preparation

Open the step-by-step display guide.

The controller needs a working network connection with internet access and an active portal/cloud connection. The portal administrator configures SMTP mail delivery. On the controller display, you set the recipient and notification choices, not the sender mail server or password.

Open the display settings

  1. Home → MENU, then sign in with your own Administrator or Service PIN if prompted. Controller access codes →
  2. Right arrow → Settings in the lower left.
  3. Use the right arrow through the settings pages until E-mail CLOUD appears in the lower right. Administrator passes through one extra page; Service reaches it a page earlier.
  4. Open E-mail CLOUD. The tile is available to signed-in Administrator and Service accounts.

Recipient and events

Tap the address field, enter one recipient address and confirm with keypad OK. The screens use alarm@example.com; replace it with your own address. Use the symbol key to enter @. The standard LCD editor handles addresses up to 64 characters.

The upper-left Enabled/Disabled switch controls event notifications. The button on the right chooses the condition:

Condition Meaning
Luminaire fault / COM Luminaire and communication faults
Test running An active test
Emergency mode Confirmed emergency operation
All healthy No faults, communication faults, emergency operation or active tests
Faults and emergency Notifications for both faults and emergency operation

Notification method and reminders

  • On activation — a message when the condition starts.
  • Activation and recovery — messages when it starts and ends.
  • Also reminders — additional repeat messages while the condition remains active.

With reminders selected, − / + buttons appear. They change the repeat interval from 5 to 1440 minutes in 5-minute steps. They do not change the alarm detection delay.
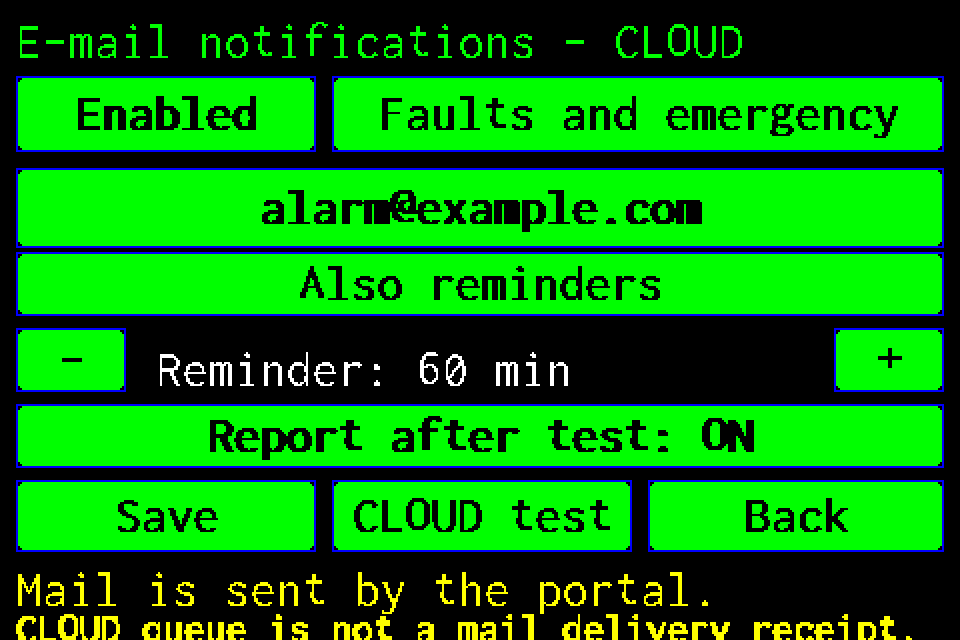
Setting reminders on the display

Stable condition, normally 30 s, is the confirmation time for an unchanged condition. This value is only displayed here.

Reports after tests

Report after test: ON/OFF is independent of the event switch. Reports can remain enabled while event notifications are disabled, but still require a valid recipient address. Enabling the option does not resend the existing archive. New reports contain test results and a CSV attachment. Notification language follows the controller language at the time of the event.

Save and test

  1. Press Save and wait for Configuration saved. Back does not save changes.
  2. Press CLOUD test. If Save configuration first appears, save the current settings and repeat the test.
  3. Test queued for portal processing confirms the request, not delivery of an email.
  4. Check the recipient inbox and spam folder. If no message arrives, check the recipient, portal connection and mail-sending configuration with the portal administrator.

Correct an invalid address. If saving fails or settings were changed remotely, reopen the page and check the current configuration before saving again.
EZF Wiki · Wiedza pod ręką.